Want a to learn to make a “hip” drink that is delicious, beneficial for your health and that cost mere pennies to make?
Kombucha is a beverage that has a favorite of mine for quite awhile. It is a traditionally fermented beverage whose roots are from Middle Asia/Russia. The people of that civilization have known for a couple thousand years the amazing health benefits of kombucha but it wasn’t till the 1990’s that it started becoming more popular in the United States.
It has a rich history of possibly preventing and fighting cancer, arthritis, and other degenerative diseases. It has also been known to help detoxify the body because of its probiotic qualities.

You can buy kombucha from health food store like, Whole Foods, Sprouts and Henry’s but you will spend about $3.00-$4.00 per every 16oz bottle. It is so simple and inexpensive to make at home that I only buy it when I go on a trip. I can make gallon of kombucha for about $1.50 at home.
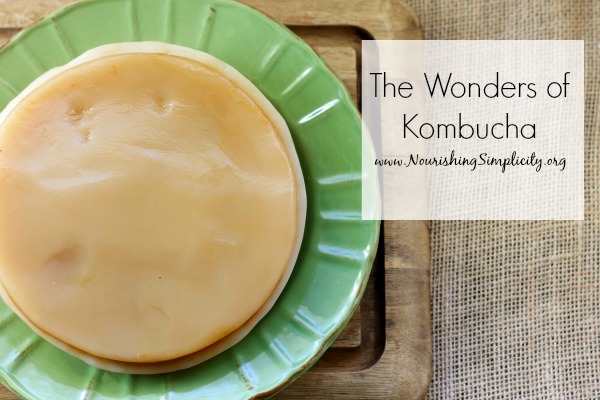
Kombucha is made from sweetened tea that has had been fermented by the SCOBY or mother (a symbiotic culture of bacteria and yeast). It may sound a little disturbing but oh is it delicious and amazing for your body.
You can purchase a scoby on line from stores like Cultures for Health or if you are blessed enough to have a friend that makes kombucha you can get one from them. That’s how I got mine. Here’s a link to making your own.
Every few times you brew kombucha your scoby will produce another one, a “baby”. You can separate it from the mother from the baby and start a second jar brewing, save it for later or gift it to a friend. If you give it to a friend they’re sure to love you forever. As long as you continue to brew your lovely kombucha is a clean environment you will get many years of use from your beloved scoby and offspring.
In her cookbook “Nourishing Traditions” Sally Fallon describes the Kombucha process quiet well:
“The kombucha ‘mushroom’ acts on sugar and tea to produce not only acetic and lactic acid but also small amounts of a potent detoxifying substance, glucuronic acid. Normally this organic acid is produced by the liver in sufficient quantities to neutralize toxins in the body…However, when liver function becomes overloaded, and when the body must deal with a superabundance of toxins form the environment-certainly the case with most of us today-additional glucuronic acid taken in the form of kombucha is said to be a powerful aid to the body’s natural cleansing process, a boost to the immune system and a proven prophylactic against cancer and other degenerative diseases.”
Another great thing about kombucha is that you can flavor it however you want. You can put fruit in the jar, screw on the lid and leave it out for another day or two.
I like to pour the kombucha into individual bottles and jars and then put a different kind of fruit in each one, remove the fruit after two days or if you’re like me you can just leave it in and drink it.
I’ve found that the best bottles to use are my old Kombucha bottles from Whole Foods; they have a great seal so it really helps build up the carbonation. Canning jars work as well but when I use those they have less carbonation. However you make our kombucha, it will taste wonderful. You can refrigerate your kombucha if you want to but it’s not necessary.
Now let’s get down to the important part how to make Kombucha. You start with a clean 1 gallon glass jar, don’t wash it in the dishwasher; washing it buy hand is fine and preferred.

The Wonders of Kombucha
Ingredients
- 1 cup white sugar (organic is good but not necessary)
- 1 gallon of purified water
- 1/2 cup of kombucha
- 6 organic black tea bags (or 6 tsp of lose leaf organic black tea)
- 1 scoby
- 1 gallon size glass jar
- 1 glass 2-cup Pyrex measuring cup
- 1 cloth napkin, towel or cheese cloth
- 1 rubber band or piece of twine
Instructions
- Bring to 2 cups of water to a boil. Put the sugar and black tea in the Pyrex measuring cup, pour boiling water over and stir till the sugar is dissolved.
- Let brew for 10 minutes. Remove the tea bags or loose tea and then pour the tea into the gallon size glass jar.
- Fill the jar with purified water to 3 inches below the rim.
- Once the tea is completely cooled add the scoby and 1/4 cup of kombucha.
- Cover with the cloth and secure it with the rubber band or twine.
- Let it brew for at least one week. In the summer I let mine brew for two weeks, in the winter time I let it brew for four weeks. It really depends how you want it to taste and temperature inside your house. I like mine just a bit sweet. They longer you let it brew the stronger it will taste, in addition the longer it brews the less sugar it has since the scoby feeds off the sugar and tea. When you are satisfied with the taste remove the scoby and reserve 1/4 a cup of the liquid to start another batch.
My favorite flavors:


Hi! I just received a scoby. Reading your recipe I notice it calls for 1/2 cup kombucha. Do I need to buy a bottle of kombucha for my first batch and then save it from each batch to start a new batch? Thank you for the clarification!
I am so sorry for the late reply! Yes, I should make that more clear. When I have started a new batch of kombucha I was given a scoby in a small jar of kombucha, which is how I have always gifted it. Yes, I would, if you haven’t already, buy a bottle of plain kombucha. After that you can just save a 1/2 cup out from your future batches. Good luck!!
Been looking for a kombucha homemade recipe! Thanks!
Your welcome!! 🙂
Thanks so much for adding your link to my FB question on making Kombucha! Love your simple instructions. I hope to be brewing my own soon! Blessings, Kelly
I hope it was a help! Blessings! 🙂
I like to use a jar with a spigot so I can continually brew my kombucha. I just add sweet tea to the top after I have taken some from the bottom. That way I never run out and I don’t have to worry about brewing time. I’ve heard that longer brewing makes it even better for you. Personally, I use a 2.5 gallon ceramic water jug, but a gallon jug worked fine as long as I didn’t use more than about a quart/day.
Jill, thanks for sharing. Interesting on how didfferent we make it. I just reread what I wrote and realized that I didn’t write my brewing time for my tea. I added that in. You maybe right about the difference in how we make our kombucha effecting the brew time. It might be why my scoby doesn’t make a new baby each time. I believe my friend who taught me to make it based her recipe off of Nourishing Traditions. I’ve never had a problem with my bottles breaking and never to experience that… I might try your way next time I make it and see how it turns out. Always fun to learn something new!
Brandislee, thanks for sharing your link! I added it t my post!
Awesome post! I also posted a kombucha “how to” on my blog this week, and you might find the “making kombucha without a mother” portion interesting, for your readers who can’t find a mother and don’t want to order one online. http://crunchythriftycool.blogspot.com/2011/07/make-it-yourself-monday-kombucha.html
I also make kombucha, but I only let mine brew in the gallon jars for about a week (my house is about 78 degrees with air conditioning in the summer). If I let mine go two to four weeks I think I’d have straight vinegar! Interesting! My instructions are a little different: I use 6 tea bags (half green, half black) and 1 cup sugar per gallon as well as about 1 2/3 cups starter tea from the previous batch. I also stir the sugar, then add tea bags directly to the pot of boiling water and then let it steep till cooled to room temp. It might brew a little stronger tea. I also wonder if the extra tea bags plus more starter tea from the previous batch makes it brew quicker. Also, my scoby’s make new babies every batch (every week).
I have had good luck using glass carbonated water bottles (perrier bottles have a good seal) and let them sit for about a week at room temp in the bottles with only about 2-3 berries per bottle (depending on the berry–I generally don’t use more than 2 if they are juicy berries like blackberries or raspberries per 25 oz. bottle). The last time I used much more fruit than that I had a bottle break under the pressure of carbonation (a couple times I’ve had lids “blow” off after a few days of sitting in bottles)! I also think that the lid I used on that bottle had “too good” of a seal. At any rate, thought I’d share the difference in brewing time along with the slightly different instructions in case it makes a difference for anyone!
About A Mom, you’re welcome. I hope you are able to give Kombucha making a try.
This is new to me! Thanks for sharing. I am a new follower from the week long blog hop! I would love for you to stop by http://aboutamom.com to say hi & return follow!
Jason, what you’ve never made it? Hope you do rememdy that.
With all of the natural things that I talk about and promote…I can’t believe that I’ve never tried this recipe. I will rememdy that very soon.
Thanks for sharing at the hearth and soul hop last week.
Carrie so glad you “hopped” over! 🙂 I hope you can start making some kombu soon!
AHH! I love you! I haven’t found such a straight-forward kombu recipe before. <3 My cousin is a master brewer for an indie company, but it's in MN... plenty far from MI where I live! Thanks so much. 🙂 ("Hopped" over via Homemaker By Choice.)
Thanks ladies for stopping by. Nourishing Traditions is one of my favorite cook books. There is so much to learn from Sally Fallon, the author. I was first introduced to kombucha by a friend in Mexico. I never bought it at Whole Foods until I was visiting some family in the states and was desperate for some probiotics. 🙂
Thanks for the tutorial, I have just recently heard of Kambucha, we don’t have a whole foods close by, so I am a little out of the loop. I also recently got Nourishing Traditions and can’t wait to read it. This drink sounds very interesting, and your pictures of it look yummy. Thanks~April
Oh, excellent. I always wondered about kombucha and why it was healthy. I need to get around to reading Nourishing Traditions, too!
Funny – That´s my drink! I just posted last week about kombucha! 🙂 LG Tina
Lori, your welcome! I hope you have fun making it! It’s so easy once you get the hang of making it.
Thanks for the great instructions! I’ve been wanting to start making my own kombucha.